
Over this last weekend, I had planned an Infinity game day with my gaming team so we could play our Situation: Infinity homebrew campaign (which I posted on my other blog, but forgot to make sure it was also posted here. Until I get that taken care of, feel free to view the announcement post on Interminable Writing for some background on this project). Originally, we had a match planned for our ALEPH and Tohaa players, but unfortunately the artichokes weren’t able to make it to the party, so we decided to have Anthony, our Combined Army player, and me play a game instead.
The game was played with 200 points, and was a fairly straightforward deathmatch, with the caveat being that I had to keep a designated target (Rosie Munroe) alive through the whole game. Because Anthony is the least experienced member of our team, I had Eric (DeepThought) coach him through the process of building a list, and they chose to play with morats while I played my USAriadna.
Lists
Anthony’s list
Morat Aggression Force
──────────────────────────────────────────────────
5 / 3 / 4
MORAT Lieutenant Combi Rifle / Pistol, Knife. (1 | 14)
RAKTORAK Combi Rifle + Heavy Flamethrower / Pistol, Knife. (0 | 23)
RODOK HMG / Pistol, Knife. (1.5 | 27)
RAICHO MULTI HMG + Heavy Flamethrower / . (2 | 89)
RAICHO PILOT 2 Heavy Pistols, D-Charges, Knife. ()
OZNAT Stalker Unit (Sensor) Vulkan Shotgun, Smoke Grenades + 1 Sync Preta / Pistol, DA CCW. (0 | 29)
SYNC PRETA Chain Rifle / AP CCW. (0 | 8)
GAKI AP CCW. (0 | 4)
GAKI AP CCW. (0 | 4)
GAKI AP CCW. (0 | 4)
4.5 SWC | 194 Points
This was the list that Anthony came up with using Eric’s input. They way that he played it was to use the Raicho and the Hungries as a sledgehammer against my forces, while the Rodok provided covering fire. The Vanguard and Raktorak didn’t do much of anything throughout the game.
My first impression of this list was that it was very short on regular orders to feed the Raicho, so I personally would have switched out the Oznat Stalker for any one of the other Oznat units so they could form a link with the Hungries and drastically improve the order count. However, due to some initial confusion about how the Hungries control device works, we decided that through the course of the game we would treat the Oznat and hungries as though they were in a weird sort of core fireteam and they stayed regular and non-impetuous, so the problem ended up solving itself, although I’m 99% sure that was against the rules (I just couldn’t find on the wiki anything that states whether or not a G:Synch unit can join a fireteam). I made sure that everyone knew my thoughts on this, but because Anthony is relatively inexperienced, I didn’t want to club him too hard over the head with the rulebook and let it slide.
My only other critique of his list would be that, because the Raicho and Hungries would be the teeth of his list, I would have used a Rodok with a missile launcher instead of the HMG to give his team better reactive capability.
Interestingly, when I was recreating this list so I could show it here, I discovered that it was 0.5 SWC over the limit, but the check mark printed in the corner of the hard copy he used said that the list was ITS legal. I guess that Army forgot how to count that day…
Scribbler’s list
USAriadna Ranger Force
──────────────────────────────────────────────────
9 / 1
112 (Motorized) Light Shotgun / Pistol, CCW. (1 | 20)
GRUNT Rifle / Pistol, Knife. (0 | 10)
GRUNT (Forward Observer) Rifle / Pistol, Knife. (0 | 11)
GRUNT Paramedic (MediKit) Rifle / Pistol, Knife. (0 | 12)
GRUNT (Marksmanship LX) Sniper Rifle / Pistol, Knife. (0.5 | 18)
MINUTEMAN Lieutenant AP HMG / Pistol, CCW. (1 | 34)
BLACKJACK T2 Sniper, Submachine Gun, Chest Mines / Heavy Pistol, CC Weapon. (1 | 36)
FOXTROT (Forward Observer) Rifle, Antipersonnel Mines / Pistol, Knife. (0 | 18)
FOXTROT Boarding Shotgun, Antipersonnel Mines / Pistol, Knife. (0 | 19)
HARDCASE FRONTIERSMAN Tactical Bow, Rifle / Pistol, Knife. (0 | 14)
3.5 SWC | 192 Points
I focused my list mainly on long-range combat, knowing that the table that we were playing on had very sparse cover. For this purpose, I started with a Grunt fireteam, composed of a Grunt sniper and 3 riflemen, 2 of which were specialists. For offensive firepower, I added a Minuteman with an AP HMG to the link, who was also my lieutenant due to SWC limits preventing me from taking a Grunt lieutenant. For defense, I brought a T2 sniper Blackjack, and a motorized 112 for support, thinking that the motorcycle and smoke grenade launcher would be very useful for crossing the table. Finally, I took 2 Foxtrot Rangers and a Hardcase to run interference.
Additionally, I was allowed to include Rosie in my list at no cost in points or SWC, but there was a catch: she had to deploy Isolated, and disperse from the center of the table as though she was an AD troop that failed its roll. Additionally, I had to keep her alive until the end of the game.
Initiative & Deployment
Because the mission called for a forest setting and I haven’t finished my forest scenery, the board was extremely light on cover; so much so that I would say that we didn’t have anywhere near enough scenery on the table. To compensate, we arranged a few buildings in the center to look like an abandoned outpost and scattered every model tree I had in my possession to break up the fire lanes. It wasn’t perfect, but at least our troops could stick their heads out without drawing an ARO from every enemy model on the table.
Before we made our initiative roll, we dispersed Rosie onto the table, and she landed in a relatively protected position, with the exception of having a small fire lane going clear through the center of the table. As per Murphy’s Law, she ended up in the middle of the fire lane.
I won the lieutenant WIP-off, and opted for deployment, choosing the deployment zone closest to where Rosie landed and forced Anthony to deploy the first model (we didn’t deploy normally, instead alternated placing down 1 model) while he took the first turn.
Scribbler’s Deployment


I deployed my Grunt fireteam in a defensive position protected by trees not far away from Rosie. The Minuteman and paramedic Grunt lay prone in total cover, while the sniper locked down a corridor that cut diagonally through the table. The remaining two grunts were positioned near a mound of earth and watched the team’s left flank. On their left was a large crate, where I positioned the Blackjack and crisscrossed his line of fire with the Grunt sniper, while the 112 sat out of sight behind a building on the left flank of the field.
Further up the field, I deployed my boarding shotgun Foxtrot in the second story of the central building in total cover, and to the left of her was a FO Foxtrot hiding prone behind a rock. Directly in front of my Grunts was a building where I deployed the Hardcase, his ambush camo positioned at the corner of the building that the Foxtrot was in.
Anthony’s Deployment
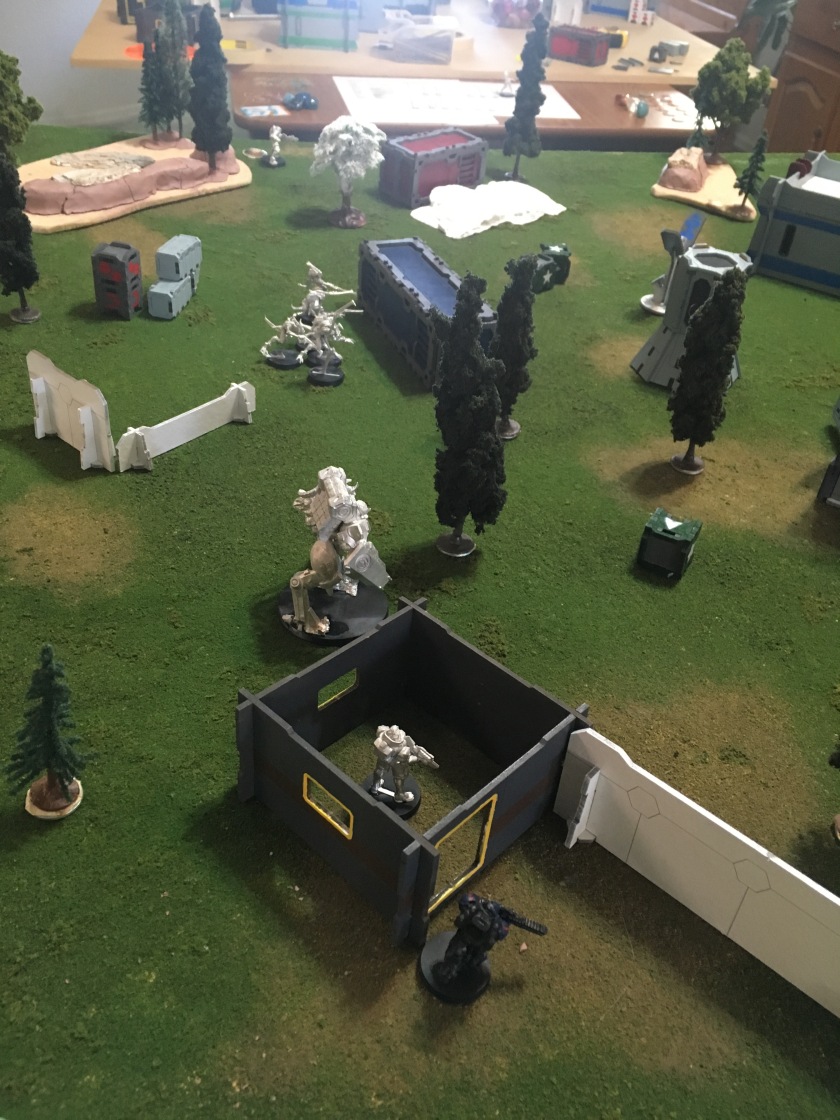
Anthony deployed all of his Morats as far up the field as possible. Moving from his right to left flank, he placed down his Rodok HMG right next to a bunker, with his lieutenant standing inside and the Raicho to the left of them. In the center of the field was the Oznat and Hungries “link,” and on his far left was the prone Raktorak.
Round 1
Turn 1 – Morats
Before making his first move, Anthony spent a command token to activate the special campaign ability for Combined Army, which allowed him to make a WIP +3 roll with his lieutenant to try and force me to reveal who my lieutenant was. He passed his roll, revealing my Minuteman as the head honcho. He spent his first order moving his exposed Raktorak into cover behind a large crate.
On the other side of the table, he spent an order on the Rodok to move it into the bunker, where he then proceeded to wipe out 90% of my score by unloading his HMG into Rosie and killing her, although we ended up leaving the model on the table. Then, after moving the Raicho up to a small crate (which its fat ass definitely couldn’t fit behind), he dropped the Rodok into suppression fire.


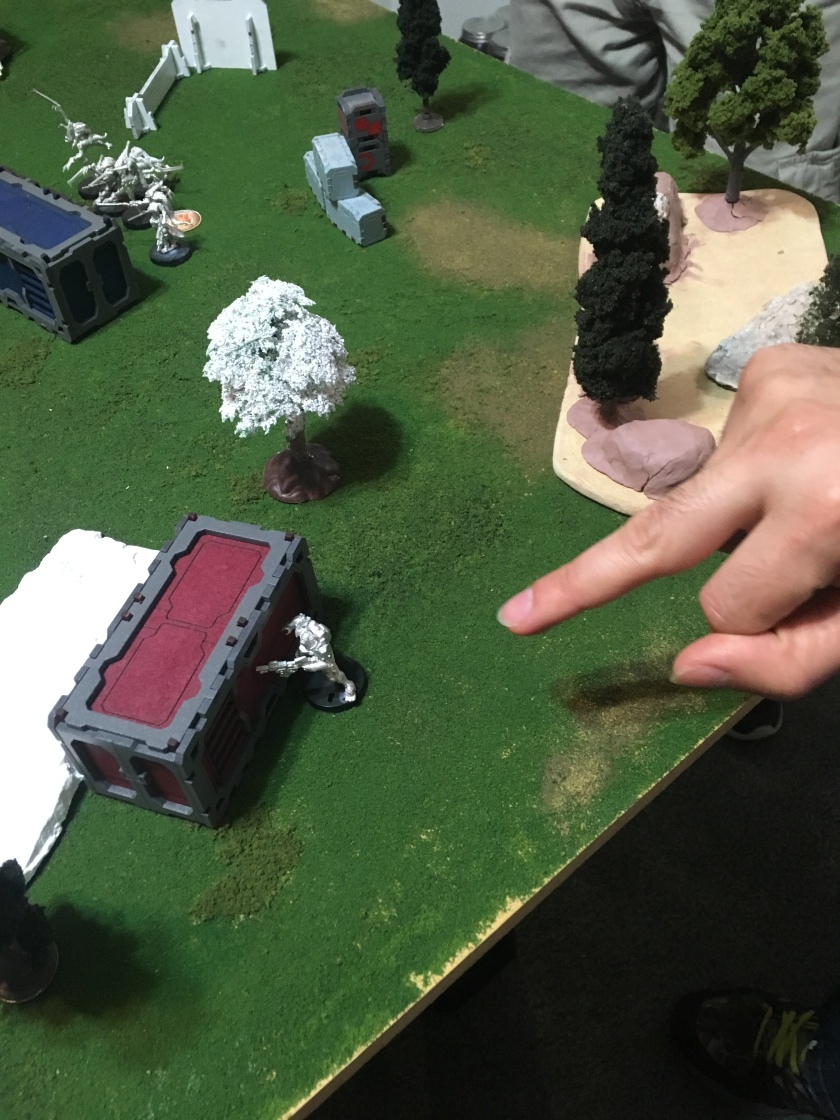
Switching gears to the Hungries, Anthony moved the Oznat on top of the large crate in front of her and landed a smoke grenade in the junction between the two buildings in front of my Grunts, blocking the line of sight for both the Grunt sniper and the Blackjack so the Gakis could rush forward without being gunned down. I though that he was going to charge my linkteam or the Blackjack, but he decided out of left field to run them onto the second story and surround my Foxtrot while he moved his Oznat and her synched Preta around the other side of the building. He finished out his turn by hiding his lieutenant in the corner next to the Rodok.


Turn 1 – USAriadna
Losing Rosie was a hard hit to my ability to score points, but despite her loss, I still had all of my troops, and I could still earn points by killing the enemy. I decided to start by taking it out on the Rodok with my Blackjack, but he missed both of his shots while the Rodok dodged back, forsaking cover to maintain his field of view without being seen by the Blackjack.
Knowing that the Raicho was positioned to become a problem in my next turn, I spent an order on my fireteam, moving my Minuteman out of cover where he could see the Raicho and spending the next few orders shooting at it and taking a wound off with a crit before getting shot down and sacrificing my paramedic to revive my lieutenant before making a hasty retreat back to the trees. Unfortunately, the Minuteman got shot again on his way back, and I didn’t have my paramedic to easily get him back up.
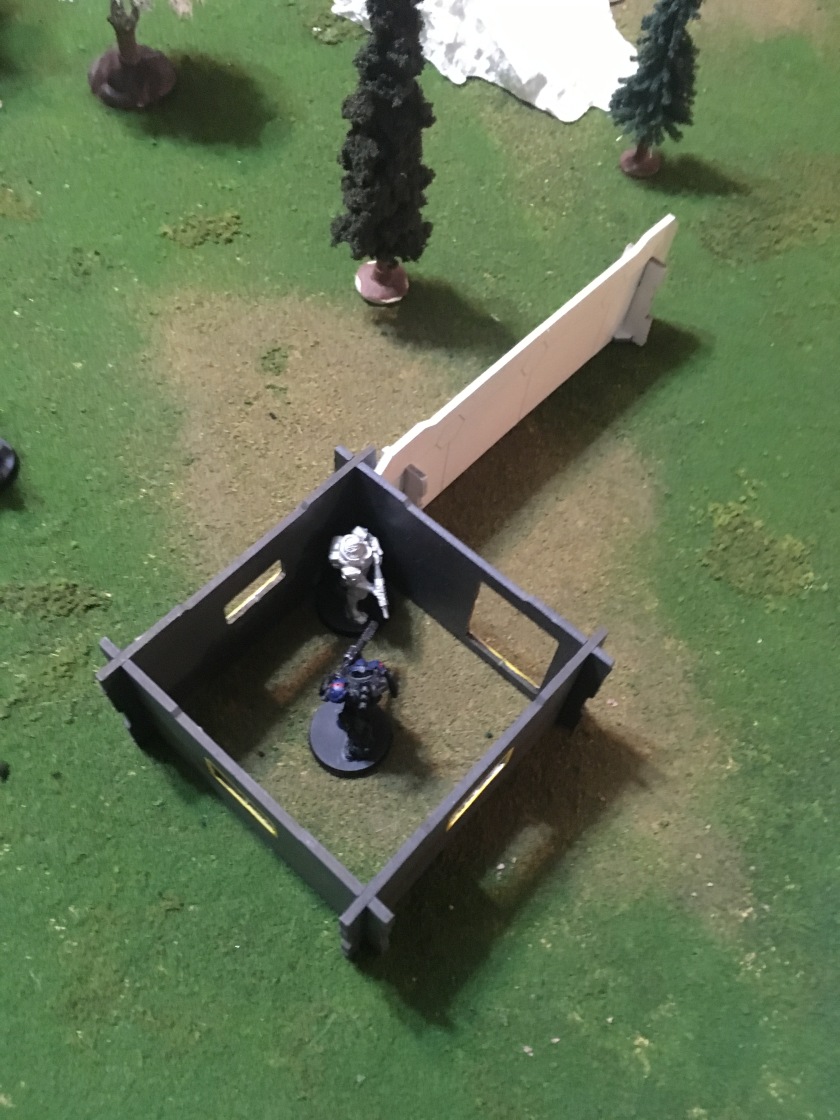
Having failed that plan, I shifted back to the Blackjack, moving him around the crate to where he could see the Oznat but not the Raicho. From here, I took a shot at the Oznat, but she successfully tossed down a smoke grenade, so I positioned the Blackjack on the building next to him so he could get an ARO on both the Oznat and the Raicho on the next round.
At this point, I had 1 regular order and 1 irregular order left, so I spent a command token to convert the irregular order to regular and moved the 112 over the right flank in a last-ditch effort to prevent myself from going into Loss of Lieutenant. Despite the motorcycle’s fast movement, I didn’t have enough orders to get him into base contact, so I had to shoot my medikit into the Minuteman. Here my bad luck bit me again, and the 112 shot the needle into the Minuteman’s throat and killed him. Nuts!


Round 2
Turn 2 – Morats
At this point, having swatted my counterattack away like it was nothing, Anthony began to clean house on my forces. He started by trying to discover the Foxtrot with one of the Gakis, and since I figured that she was probably dead regardless of the outcome, I decided to go out on my terms and shot the discovering Gaki with a boarding shotgun. I had hoped that I would wound the creature and cause it to blow up and take out the whole team, but it made its ARM save and moved into base contact. The next order saw it predictably knock out the Foxtrot in one move. Next, the Raicho went on a rampage, taking out the Blackjack before advancing up to the two-story building to get a bead on what was left of my linkteam and spending the remaining orders to mow down the Grunt riflemen and the 112.


At this point, I suspected that I was close to Retreat, so I added up the remaining points on my list, and the combined total of the Grunt sniper, FO Foxtrot, and the Hardcase was exactly 50 points, so I was technically in Retreat! By this point it was late in the evening and I knew that I had lost, so we called the match, handing a decisive victory to the Combined Army and crushing defeat to Ariadna.
Reflection
I was genuinely surprised by the outcome of this game because this was only Anthony’s third or forth game ever, and the first time he played with more than 5 models. Meanwhile, I have been playing Infinity for roughly 4 years and had spent a lot of time familiarizing myself with the rules and strategies, so I honestly expected that I would handle the mission without a problem. That did not happen, but I am actually glad that it turned out with a win for Anthony so that he didn’t feel demoralized and quit the game. I have certainly been in a situation where I was playing a game and got absolutely curb-stomped. As anyone who has experienced this can attest to, it feels terrible and makes you not want to play anymore, so I’m happy that he could walk away feeling accomplished, even if it was at my expense.
As for what I could have done better, I think there are only two real mistakes that I made. The first was using the Minuteman’s full movement to shoot at the Raicho. This is because when he got taken down, I had to expose my paramedic to heal him, which allowed the Raicho an unopposed shot to take her out. I should have only moved him out far enough to see the Raicho (slicing the pie, as it is called) without having to risk moving the paramedic within line of sight. While I was at it, I probably should have moved him into cover as well.
The second mistake was forgetting about the fireteam bonuses that my Minuteman was supposed to get. For some reason, I remembered to mention to Anthony when he moved his Oznat “link” to apply the fireteam bonuses to her, but I completely forgot to apply all of those bonuses to the Minuteman. I suspect that that probably would have swung the game a bit, but I’m not sure if it would have been enough to compensate for the atrocious luck I was having. The number of rolls that I actually made could probably be counted on one hand, and with the exception of one crit, they were all beaten out.
Finally, I don’t feel easily intimidated whenever my opponent brings a big model or scary profile, so I wasn’t very concerned about the Raicho or the Hungries. I figured that the Minuteman could probably handle the Raicho with his AP ammo, and I assumed that the Hungries would dash into the line of sight of my snipers and be shot to pieces. Neither of these plans worked because of either bad rolling or the Gakis not doing what I thought they were going to do, and I forgot that the Oznat carries smoke on her. I am definitely going to take these profiles a lot more seriously in future games.
